Machine Tools
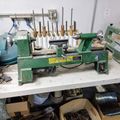
Central Machinery 1/2 HP 10x18 Wood Lathe
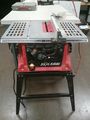
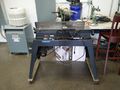
Skilsaw 10" Tablesaw

Central Machinery 16" Variable Speed Scroll Saw
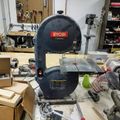
Ryobi BS901 1/3 HP 9" Bandsaw
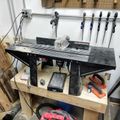
Craftsman Router Table with Removable 2 HP Router
Craftsman 6" Jointer Planer
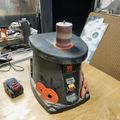
Wen 1/2 HP Oscillating Drum Sander
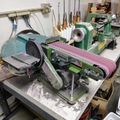
Central Machinery 4x36" Belt and 6" Disc Sander
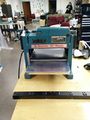
Makitia 12x6" Planer

10" Sliding Miter Saw
70 Gallon 2HP Dust Collector


Hand Tools
- Hand Saw
- 6 inch Coping Saw
- Claw Hammers
- Carpenter square
- Quick square
- 60" Ruler
- Palm sander
- Dewalt Sawhorse (x2)
- Dremel 200
- Hand Drills (x3)
- Forstner Drill Bit Set (1/4 in. - 2-1/8 in.)
- 115 piece Drill Set
- Bar Clamps (various)
Safety
The WoodWorkers Guild of America has an excellent series of videos covering may tips and safety rules for various woodworking equipment. If you are ever uncomfortable with a tool or do not feel safe STOP immediately and ask for help. Rushing through a project is not worth it!
Table Saw
Miter Saw
Band Saw
Jointer
Router
http://www.wwgoa.com/article/12-tips-for-using-a-router-safely/
http://www.finewoodworking.com/workshop/article/12-tips-for-router-table-safety.aspx
Planer
Contents
Woodshop 101: box with lid and side handles
Supplies
- 8’ long 1x12" wood board, one per box (note actual lumber size differs from what is labeled)
- 1/4" diameter wooden dowel pins
- Sandpaper (medium and fine)
Tools
- Sliding miter saw
- Drill/driver
- Jigsaw with a wood blade
- 1-2 band clamps
- Tape measure
- Wood glue
- 1.5" Forstner bit
- Speed square
- Oscillating Spindle Sander (optional)
Instructions
- Using the miter saw, cut the board into six pieces using the following dimensions. Be sure to support the long end of the board and clamp the workpiece while cutting.
- 2 front: 17 5/8" x 12"
- 2 sides: 12" square
- 2 top/bottom: 16" by 12"
- On each side panel, draw a horizontal line 2" from the top against the grain. Now find the center of the side, and mark. This will be the center of your box handle. Measure out 1"5 to each side from this spot and make a mark. These crosshairs are the starting point (center) of your Forstner bit.
- The holes should be inline/parallel with the grain so the board does not potentially split along the grain during a heavy load
- Tip: Initial all panels so they don’t get mixed up
- On the top panel, draw a horizontal line 3" from both of the short sides. Now find the center of the side, and mark. This will be the center of your box handle. Measure out 1.5" to each side from this spot and make a mark. These crosshairs are the starting point (center) of your Forstner bit
- Using the drill press, drill all the way through each of the crosshairs (8 total holes) Use some scrap wood underneath your workpiece to prevent tear out and solidly clamp the workpiece before drilling.
- Using a straight-edge, trace 2 lines between the holes to outline the handle.
- Use the jigsaw to cut out the handle. Place the blade through one of the holes, and then cut along the traced line. Repeat for all 4 handles
- Optional: Use the spindle sander to clean out the handle
- Place a thin layer of glue along all the joined edges of the box
- All 4 sides of the bottom piece
- Both sides of the side piece (with handles)
- None on the front piece
- None on the top piece
- Now it’s time to put everything together. Use the band clamp to assemble the box, making sure your edges are flush. Insert the top and bottom pieces to keep everything square.
- Using a 1/4" drill bit, drill through the front pieces into the side and bottom pieces. Use a stop collar to drill a hole 1/8" deeper than your dowel pins. Put 2 holes along the side and 3 along the bottom (7x2 = 14 total). Also, drill 2 holes through each side into the bottom.
- Note: Only drill one hole at a time! Otherwise, the holes can become misaligned and the dowels will not go all the way in.
- Put a squirt of glue into the hole and insert the dowel pin all the way. Use an extra pin to push it all the way. Repeat for all 18 holes. Wipe off any excess glue with a damp paper towel.
Optional finishing steps
- Fill the dowel holes with wood putty and wait 30 minutes to harden. Use a sanding block to sand the putty down until it’s flush with the surface.
- The edges and handles of the box can be sanded to remove sharp corners.
- A lip or hinge can be added to support the “lid” of the box.
- The box can be finished with paint or stain or left unfinished.